

If you’re planning on shooting a lot of Black & White, film photography is the way to go. Indeed, although digital cameras are clearly superior when it comes to colour imagery, the digital sensors lack the versatility and artistic freedom that black and white film provides.
On this page, I shall discuss several elements of black and white film photography. The details and the complex nerdy stuff are put in italic, so please skip it if you’re new to the game.
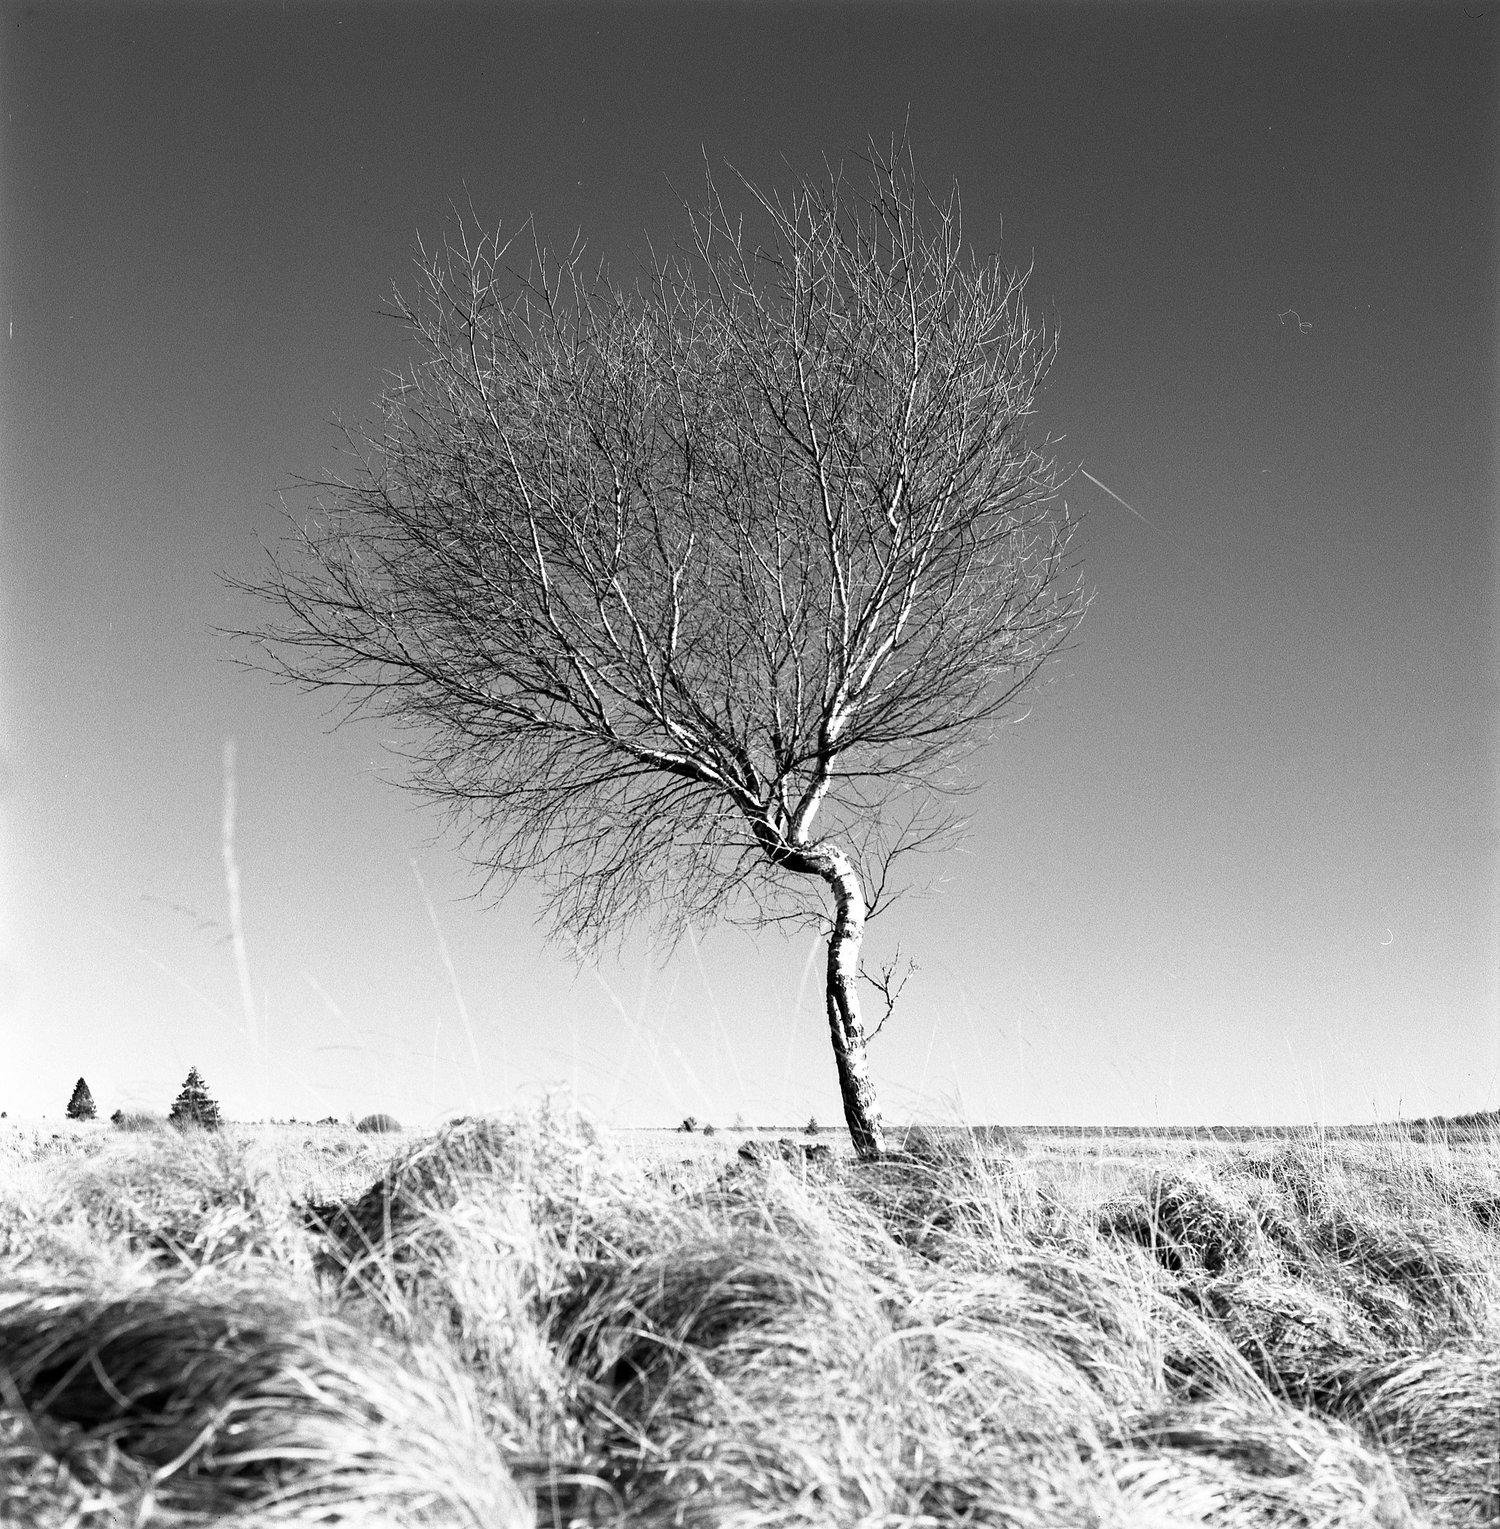
What I noticed after I started exploring the world of analog photography, is how quickly the world forgot what it was to shoot photos 20 years ago. As a 27 year old man, I actually exclusively shot digitally, so before delving into this retro world, film felt so primitive to me. We all deeply believe that the digital revolution paved the way towards even better and more artistic images, yet we seem to have forgotten the magical properties of photographic film. Indeed, there are so many more ways to manipulate analog images compared to what we do digitally that it seems almost bizarre that we chose to opt for the ease of digital photography.
However, lets not be too snobby about all of it. As wonderful as it may be to play with chemicals and different techniques, its painstakingly difficult to master all of it and, more so, printing photos in a darkroom is even more challenging. As a shameful consequence, most of us scan our images instead of printing them. And the problem lies exactly there: scanning negatives is horrible. During this process, so much of the magical quality of film is lost that most scans turn out to be flat, poorly saturated and embarrassingly unsharp. Scanning is a crime of which we are all guilty. Indeed, all the analogs I’m using on this page have been scanned by me (using an Epson V600 scanner). Anyway, I truly believe that analog photography in the hands of a master yields way more interesting pictures than digital will ever be able to achieve. Unfortunately, I’m not there yet.
What is photographic film?

Now its time for some details about photographic film. Halides are binary compounds consisting of a halogen atom and an alkali metal atom - to keep it simple: they are salts. These salts are organized into tiny crystals/grains and spread over the plastic film using a gelatin emulsion. When a photon hits one of these silver halide molecules, an electron is agitated and promoted to a higher orbital than the valence band called the conduction band. There the electron is trapped and thus, because of this state of higher energy, pure silver bindings are created and the halide is liberated. Generally speaking, at least two photons are required to convert one silver halide molecule into a two-atom silver configuration. Adding a developer to this emulsion transforms the remaining silver halide grains into silver crystals - but only those grains which already contained these two-atom silver configurations.
This brings me to a few important concepts in film photography.
Sensitive film is grainy film
The more photons (i.e. the more light) hit one of these grains, the faster it will convert into silver crystals. Consequently, the larger the grain, the larger the odds of two photons activating the halides and thus the more sensitive the emulsion. This also explains why very sensitive film (with a higher ISO) contains more visible grain.
"Mehr Licht!" - or why more light is better

When shooting film, always think about what Wolfgang von Goethe said on his death bed: "Mehr Licht!" (Eng: more light!). Here is a fun fact for you, by the way: Goethe, albeit known for his literary works, truly was fascinated by light and colours and even wrote a whole book about it called "a Theory of Colours".
Because photons are needed to activate a grain of film, and because it doesn’t really matter all that much how many silver halides are activated for the grain to be developed into silver crystals, film gets a tremendous advantage over digital photography. Whilst the latter has a very linear response to light exposure (i.e. the more light, the brighter the whole image is going to get), film has a logarithmic response to exposure: bright light activates the grains rather quickly, but as all the grains are getting activated, you need more and more light to activate the same amount of extra grains. Simply put: film is very light hungry, so the film retains more details in the highlights than in the shadows. When looking at a film negative, you’ll see that the dark (unexposed) parts of film are transparent. It goes without saying that what is transparent doesn’t hold a lot of detail. As a rule of thumb: when you are calculating the exposure time of a scene and you aren’t sure which exposure time to take, use the higher one of your several calculated values. Unfortunately, because of this somewhat logarithmic exposure response, it isn’t easy to shoot film in ultra low light. Indeed, as the scenes get darker, you have to open your shutter for a significantly longer time than you would with a digital camera (remember, you need about 2 photons to activate just one grain). This effect is called reciprocity failure (aka the Schwarzschild law).
To agitate or not to agitate?
Furthermore, by agitating the development tank containing the roll of film and the developer fluid, the halide grains are constantly exposed to fresh developer and can therefore keep changing into silver crystals at the same fast pace. This results in greater contrasts between light and dark parts of the film, as the exposed grains keep on developing and consuming fresh chemicals whilst the underexposed parts struggle to keep up with the pace.
This is, of course, a personal preference. Honestly, I haven’t yet figured out what frequency of agitation I prefer. I tend to do it about every 30s for Ilford and every 1min for Kodak, because of their inherent contrast properties.
Not all developers are equal
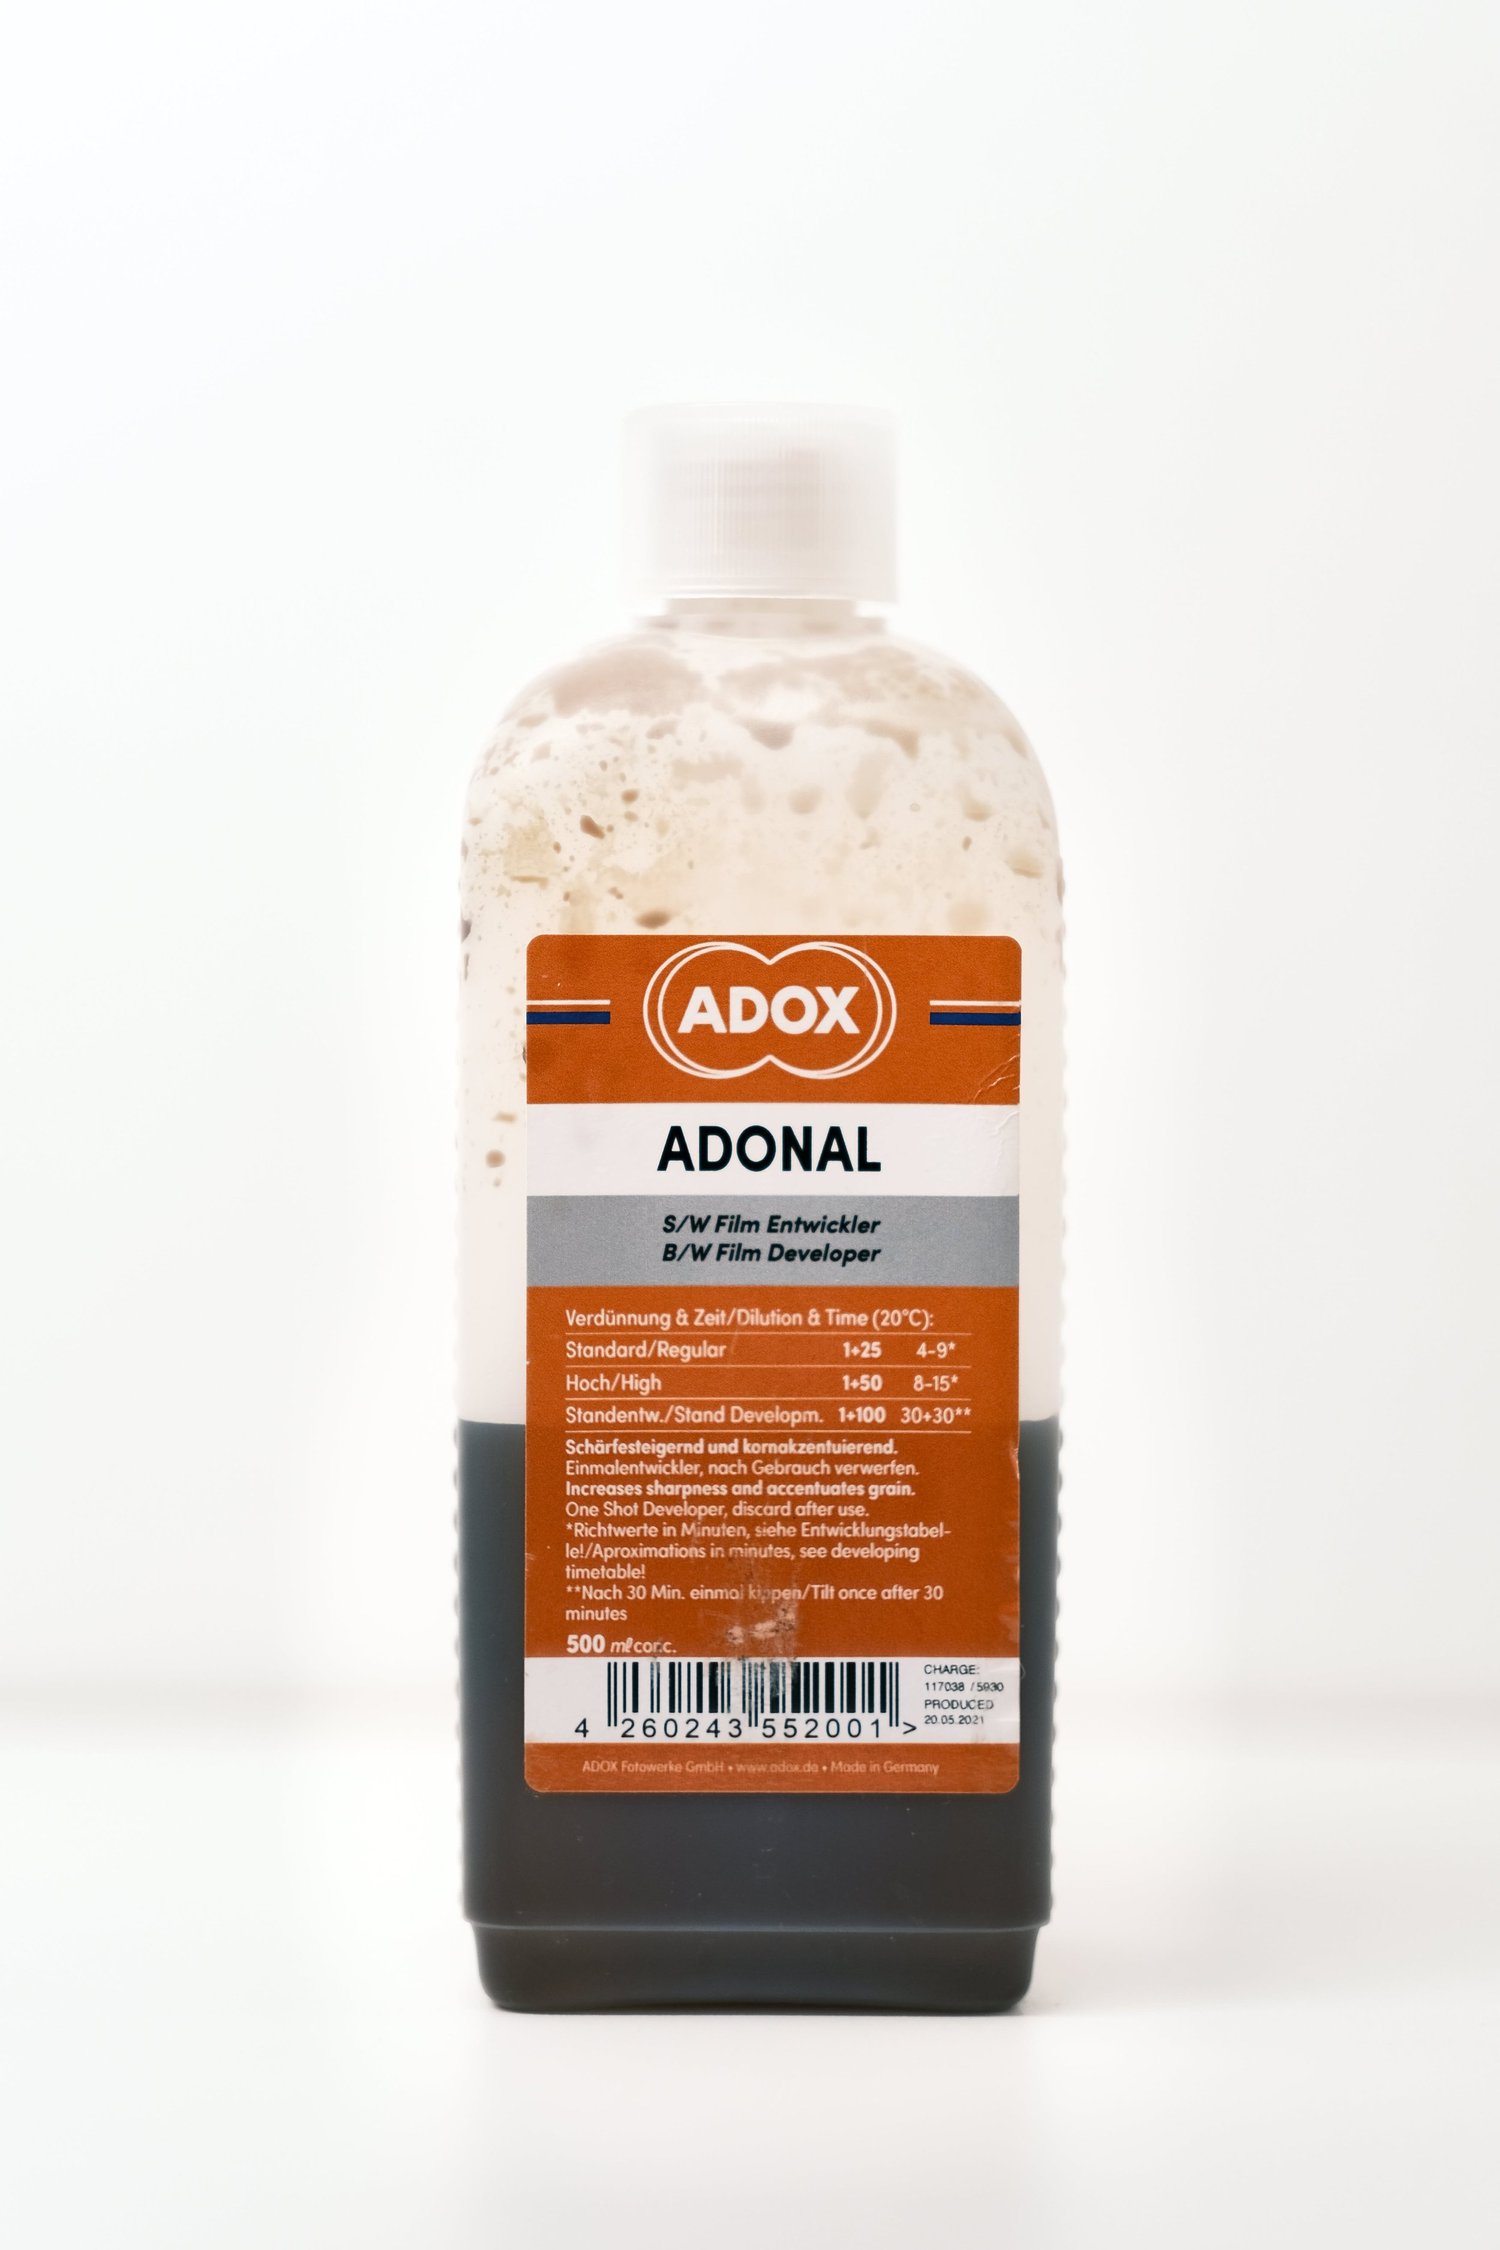
Finally, different developers have different ways of activating these crystals. Every single chemical formula has a very specific way to penetrate these grains of silver halide. Some developers are ideal for high acutance (contrast on the borders between black and white) whilst others are more suited for fine grain (called solvent developers). For instance: D-76 (Kodak) or ID-11 (Ilford) have the perfect balance between acutance and grain, whilst Rodinal has very little solvent (and thus little grain) but high acutance. Personally I use XTOL at stock concentration. I’m happy with its contrast and its amount of grain; ID-11/D-76 are a bit too flat and Rodinal gives way too much grain. Finally, XTOL is more environmentally friendly and cheap in use.
Every developer can be mixed with water at different concentrations. The more concentrated the mixture is, the shorter the development time and the stronger the contrast. A very handy website for these development times is called Digitaltruth (quite an ironic name). Make sure to check out their website.
Now, which type of film to use?
The possibilities are gigantic here, therefore I can’t discuss all the types of film. Inside of my fridge, I’ve got a lot of Fomapan (both 100 and 400), Ilford Delta 100, Ilford FP4+, Ilford XP2 and finally some Kodak Tri-X. To quote Wittgenstein: "wovon man nicht sprechen kann, darüber muß man schweigen." Therefore, I’ll only discuss these film stocks.

Fomapan 100 and Fomapan 400: these are extremely cheap and excellent choices for those who want to start experimenting a bit. Since they are so cheap, I tend to shoot a bit more lavishly with them and let my fantasy or imagination play along. There are a few drawbacks, however. The grain is significant even at box speed, and when pushing the development it can get very noticeable. Furthermore, the film’s latitude isn’t all that great. This means that you need to be more attentive to exposing correctly. Nonetheless, this should be the first kind of black & white roll to purchase.
Ilford Delta 100 Pro: as the name suggests, this one is used by a lot of professionals. It has extremely fine grain and excellent contrasts, but isn’t very sensitive to light (ISO 100). I use this one often and highly recommend it for important/valuable shoots. The downfall compared to HP5, for instance, is that its exposure latitude is somewhat smaller.
Ilford HP5: at ISO 400, its rather sensitive to light, but it has a little more grain than the Delta 100. The latitude is absolutely huge, which means its ideal for beginners. The odds of under- or overexposing are rather small here.
Kodak Tri-X: this film stock is a combination between Ilford Delta 100 and HP5. Sensitive to light with amazing contrasts. My favourite portrait film, but unfortunately so expensive that I rarely use it.
Ilford XP2: this one is interesting, as its rated at ISO 400 and needs to be developed using C41, the developing process used for colour film! This means most labs can process it and the developing times are standardized.
Ilford FP4+: Brilliant. At ISO 125 it’s rather slow, but the texture and contrast make for amazing "retro" black and white photos.
Silberra U400: a Russian film emulsion rated at ISO 400. Tremendous contrasts and grainy texture, really fun to use. Be careful though! The plastic film base is super thin and fragile.
Adding colour filters to the mix
Colour is a very important tool in creating the right contrast in a picture. A red flower sitting on a green bed of leaves will stand out immediately. In black and white, however, greens and reds become somewhat the same kind of dull gray. (Think about the medical condition called Deuteranopsia or Daltonism, where patients can’t discern green and red colours. About 1% of all males have this genetic defect.)
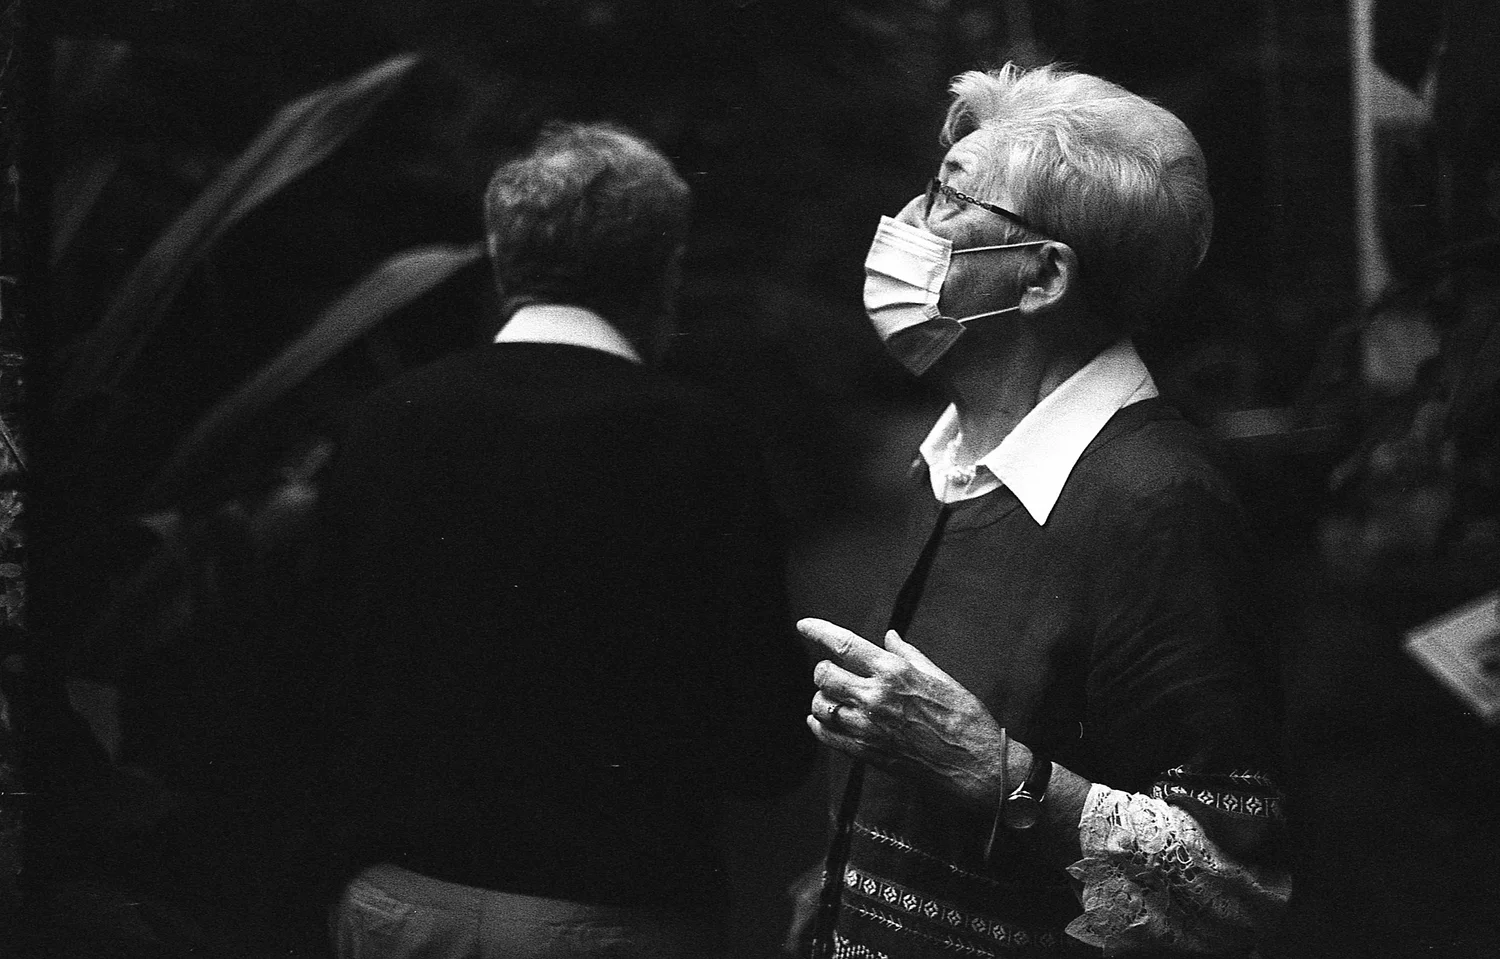
A red filter will allow all the red light to pass through, but will block most of the green or blue light. Conversely, a green filter will let all the green light through but not the red or blue waves. This results in some interesting effects: because the sky or clouds are generally blue (except for where I live, in Belgium), a red filter will make the skies darker and the clouds more visible. I therefore almost invariably recommend this red filter for landscape photography. On the other hand, lips and cheeks are reddish. It therefore makes sense to use a green filter to really darken those facial features and enhance the fullness of the lips. Using the red filter would do the opposite: the lips would become rather bright, and this isn’t very flattering.
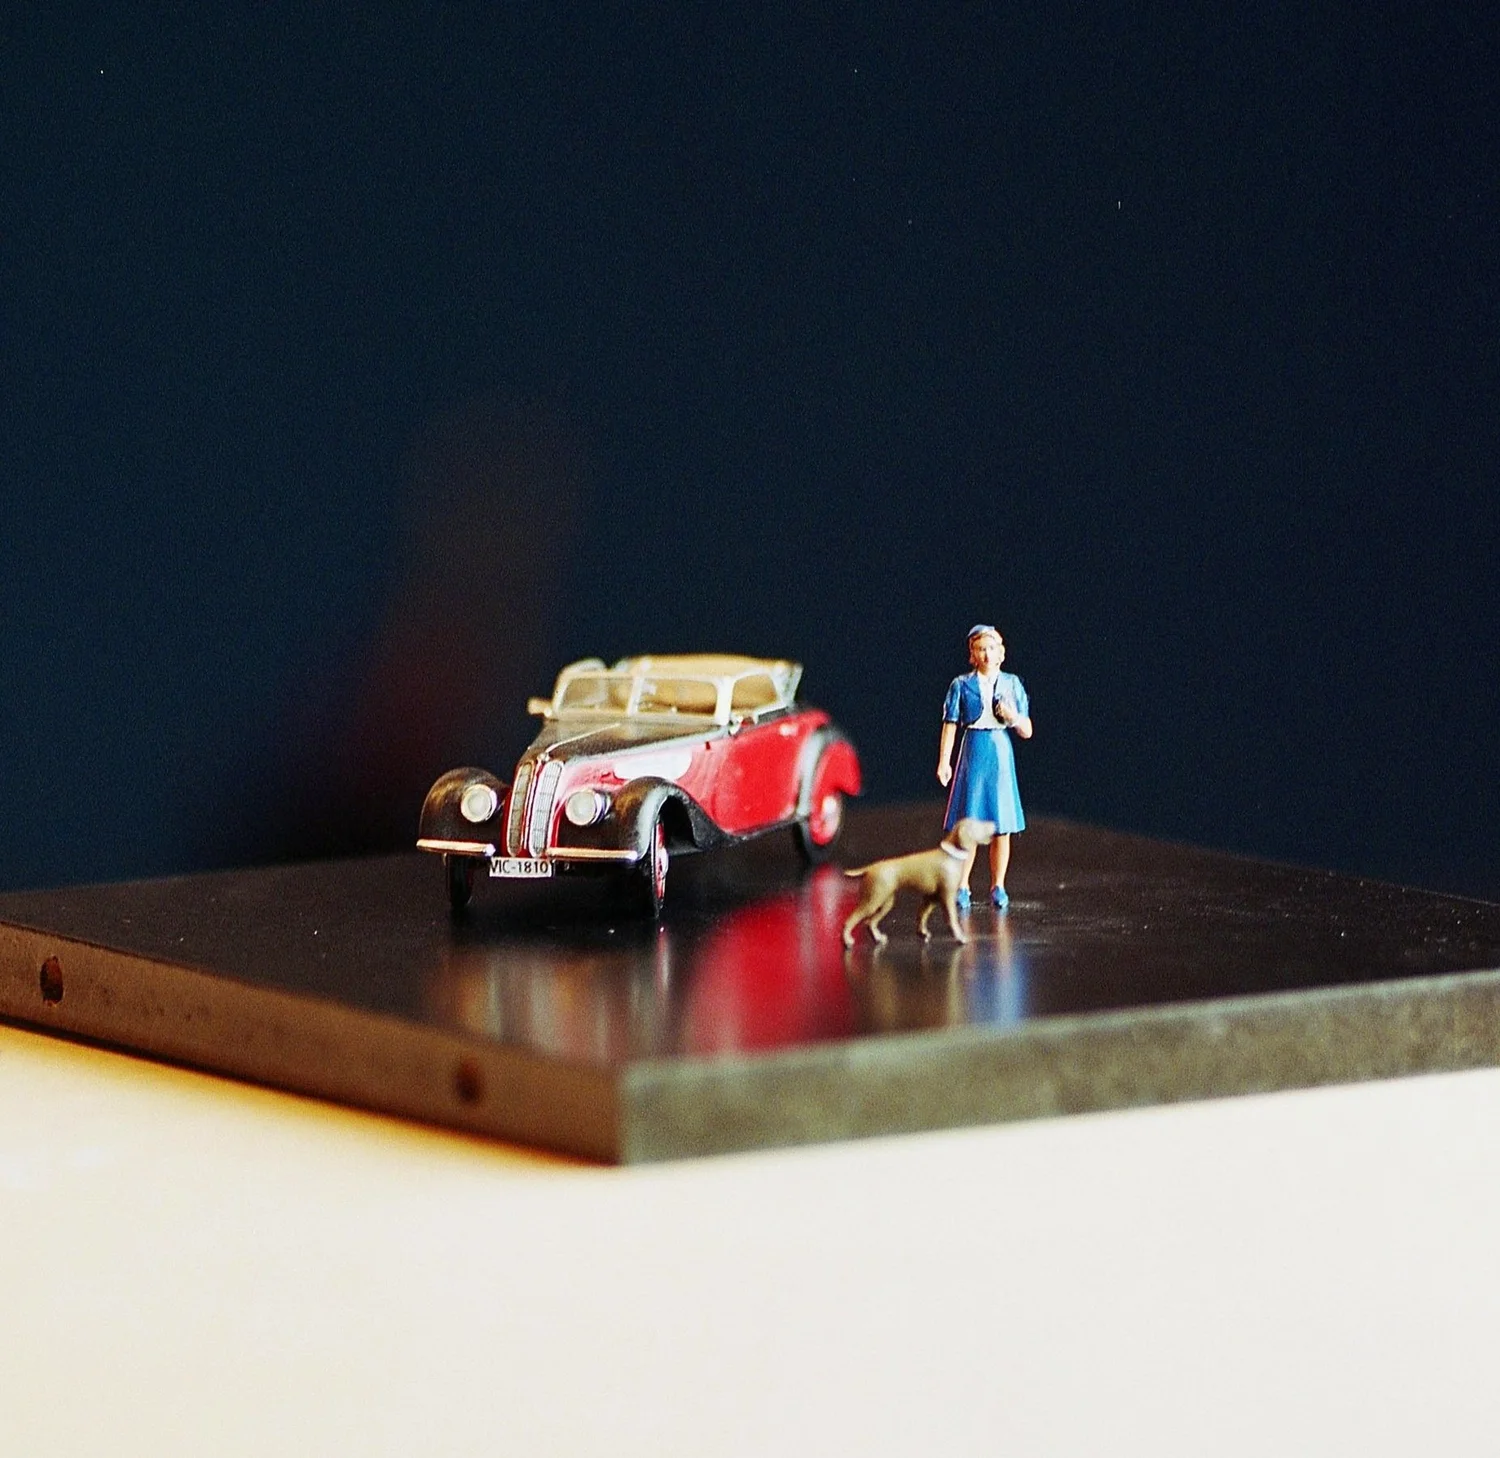
Here you see 3 photos of the same subject but with different types of filters. The differences seem rather discrete at first, but look closely.
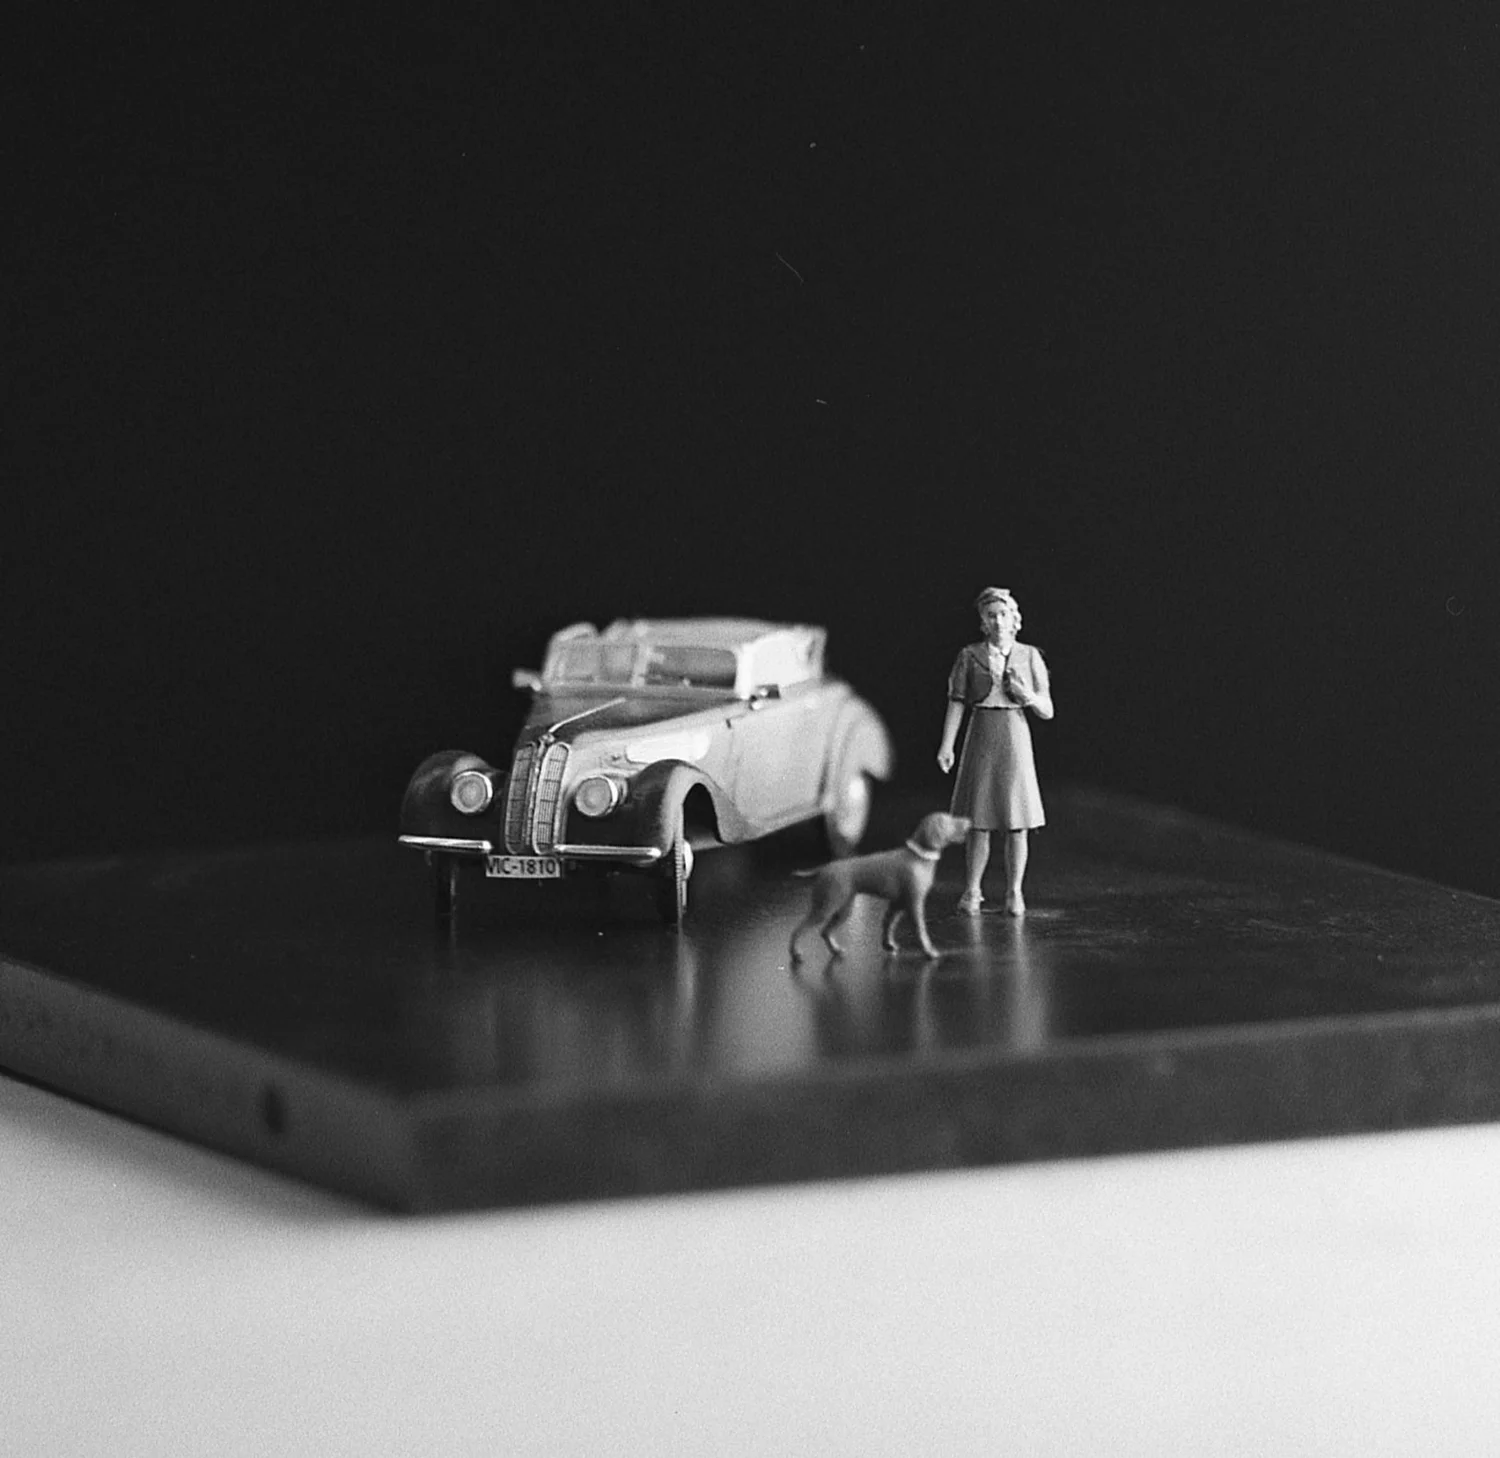

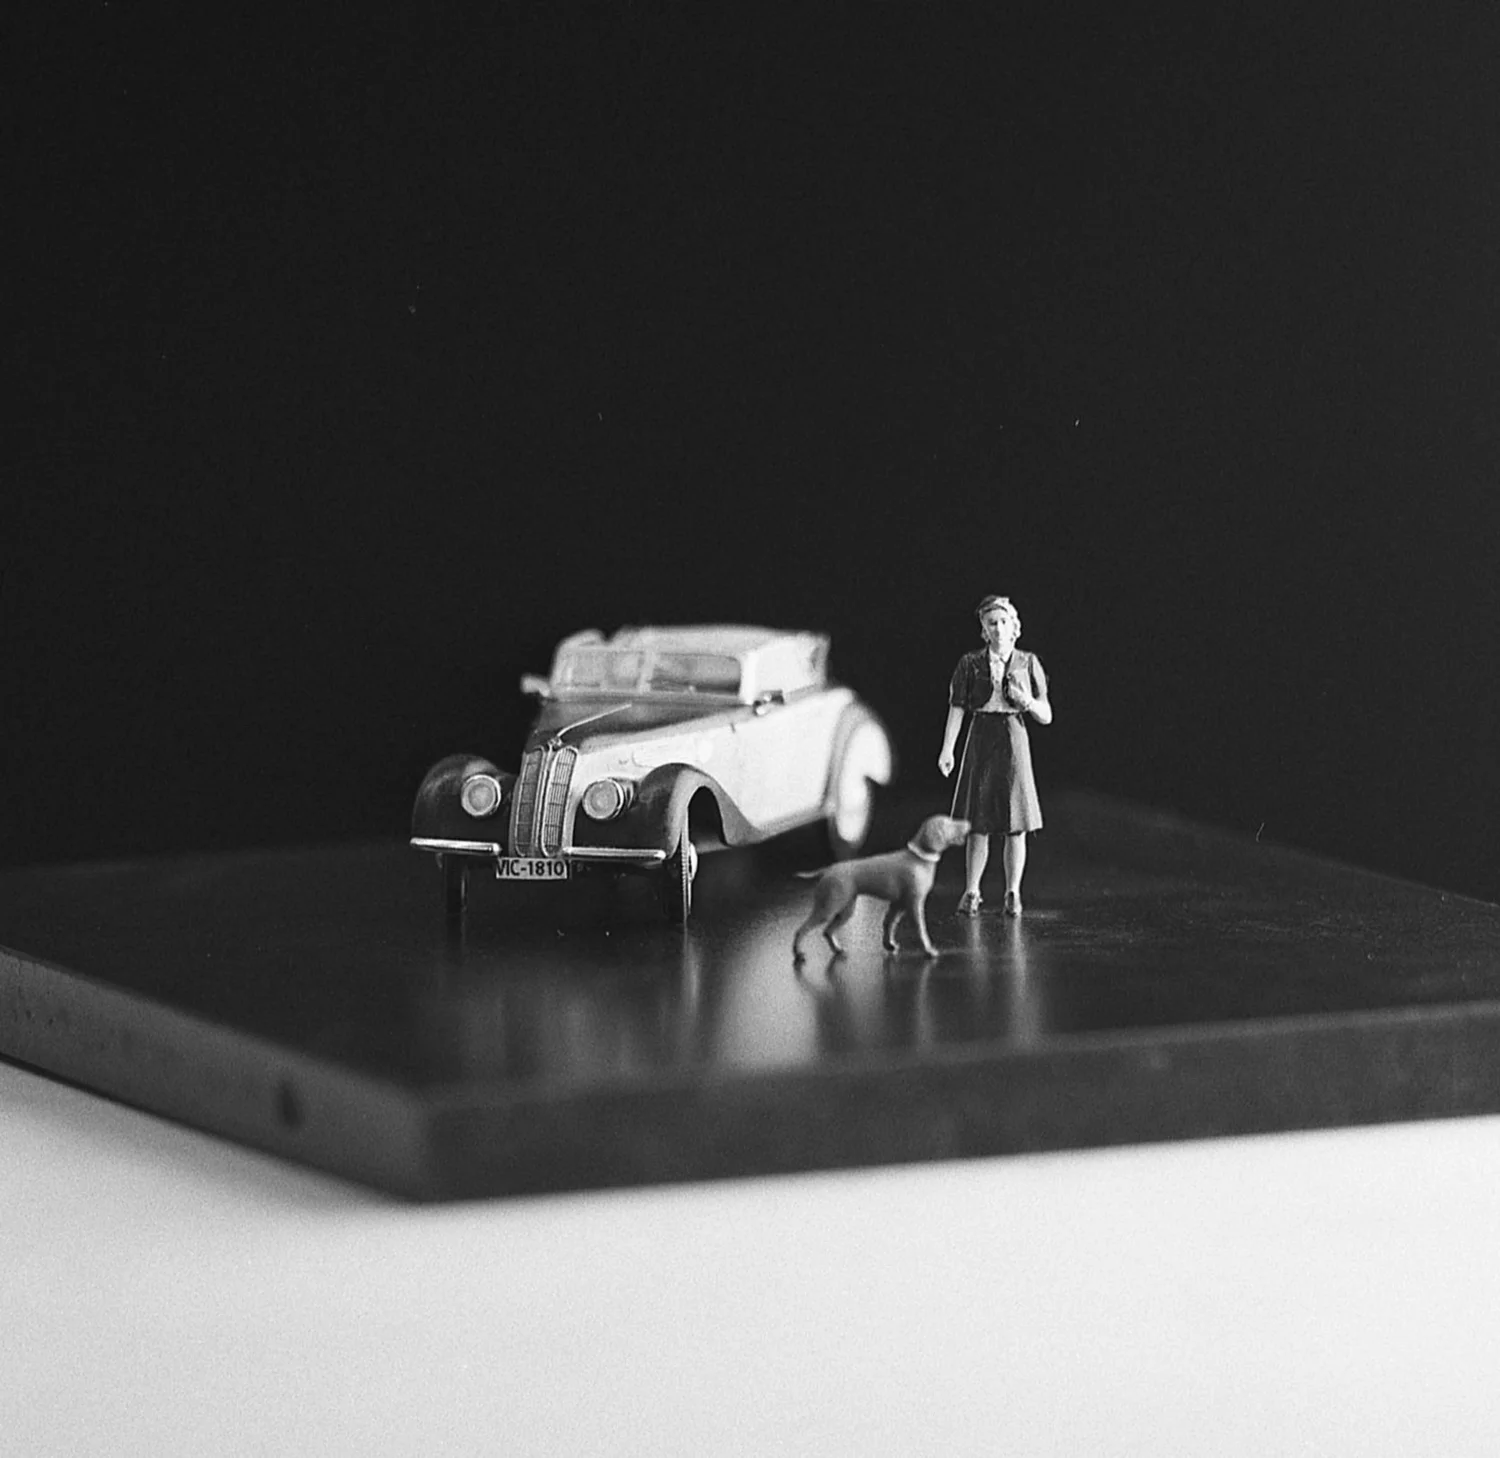

As you can see, it’s all down to personal preference. Concerning the photo of the oldtimer, I prefer the green filter because it gives a nice texture to the car. On the other hand, the dress of the woman looks better with a red filter.
The next photo is a perfect example of what a green filter can achieve. Notice how dark the lips are, and how the skin texture is actually accentuated?

The great downside of all these filters is that they block a lot of light. For a red filter, you usually need to compensate about 3 stops of light! So instead of shooting at 1/60th of a second, you’d have to shoot at 1/15th of a second (1/60s - 1 stop = 1/30s; 1/30s - 1 stop = 1/15s).
This last problem takes me to the next topic of this guide: pushing film.
Pushing black and white film
When advancing in analog photography, you will often hear the term "pushing" film. It sounds difficult at first, but actually its a fairly easy process.
First of all, when a manufacturer states that a roll of film is rated at a certain ISO, this means that the film functions at optimal conditions at that given film speed. This doesn’t mean, however, that other ISOs yield unusable results. On the contrary, in some situations, pushing film actually improves the picture.
Lets say you’re walking around with only one roll of ISO 100 film in your bag. Unfortunately for you, its fairly cloudy that day. You’ve got several options to expose correctly: you can open your diafragm, you can decrease your shutter speed, or you can cheat your camera by making it believe that you’ve got an ISO 400 roll inside of the camera. That last technique is the basis of "pushing" film.
Earlier in this guide, I mentioned that film is very light hungry, but it also needs a certain amount of photons before a grain can become activated. When using that roll of film at ISO 100, the highlights will quickly get activated, but because the shutter speed is lower with ISO 100, the shadows will have gotten enough time to activate at least some of the grains as well. Therefore, after developing that roll of ISO 100, you’ll have a nice usable gradient between highlights and shadows.
Now let’s say that we decided to rate that very same roll of film at ISO 400. Obviously, the shutter speed will have to be 2 stops slower (ISO 100 at 1/30s = ISO 200 at 1/60s = ISO 400 at 1/120s) to yield the same "exposure". The highlights will still have produced enough photons to activate most of the grains in that specific location of the film, but the shadows will really struggle to reach the silver halides. Because of this, you get a significant difference between highlights and shadows, and way more contrast. This is the main advantage of pushing film, and it’s something you just can’t really simulate with a digital camera (unless you’re editing aggressively on a computer).
It is very important to note that development times increase when pushing film! Be sure to always check the correct durations on this website: Digital Truth.
The opposite of pushing is called pulling. It isn’t exactly the same as simply "overexposing" your film. In fact, when a scene is just too bright and you know for a fact that the highlights would be too dominant, you under develop the shot inside of your lab. It takes less time to develop shadows than to develop highlights (you can’t develop when there isn’t any activated grain to develop), so in the end the contrasts are diminished. To be honest, I’ve never been in a situation where this kind of technique was necessary.
To finish this chapter, a good example to see what pushing does to a photo. I shot both images right after each other, but pushed one roll of film to ISO 400.
Development

You’ll need: a film developing tank with a reel (be careful to choose the right reel, either 35mm or 120 depending on which film you use), a bottle of film developer and finally a bottle of film fixer.
This process is extremely easy and cheap. Once you know how long the developer needs to act, you simply insert your roll of black and white film inside of a development tank. (It goes without saying that you ought to do this in complete darkness.) Next, its a good idea to pre-soak your roll of film. Just pour some tap water inside of the tank and let it linger for a few minutes, rotating every so often.
By doing so, the gelatin is soaked and will accept developer more evenly. More importantly, you’ll remove the remjet layer, something that can influence your development. What is a remjet? When light passes through photographic film, it can bounce back off the camera’s back to re-enter the film roll from behind. This is especially true for bright highlights, where not all of the light is absorbed by the gelatin during the first pass. As a result, you get weird halos around highlights. Sometimes such halos are a welcome artistic touch to images (cfr. Cinestill rolls), but more often than not they are avoided by adding a layer of acrylic paint at the back of the film that absorbs all the remaining light.
The second step is to add your mixed developer. Rotate it every minute for about 5-10 seconds. This rotation and timing is less crucial than with colour film, so don’t worry if you skip a few rotations. By rotating the tank, fresh developer can access the film to continue development.
Next, once you’ve finished development, pour out the liquid and wash the tank with film inside thoroughly (or use a stop bath such as Ilfostop).
Finally, add a fixer bath: this fixer will wash off all silver halides that haven’t been developed yet. From this step onwards, your film isn’t light sensitive anymore.
After fixing for several minutes, wash the roll with tap water to remove all excess chemicals.
Remove the film from the development tank and let it dry. Congratulations, you’ve just developed your first roll of film.
Where to buy your gear
Retro Camera - Analog photography for everyone (Belgium). This family business focusses entirely on analog products. The service is good and they offer a gigantic variety of film stocks and chemicals.
Les Ateliers de Marinette - Pellicules Argentiques (France). A lot of film, and a lot of expired film rolls as well if you’re into that. Some rolls of film are cheap, others very expensive, so always check other sites as well.
Kamera Express (Belgium/Netherlands). This website provides a lot of camera gear in general, but its customer service is worse. Prices are very interesting most of the time.
Thanks for reading!
Coming up next on VdVisuals
Colour film. Dark room printing.